
IN THIS ARTICLE
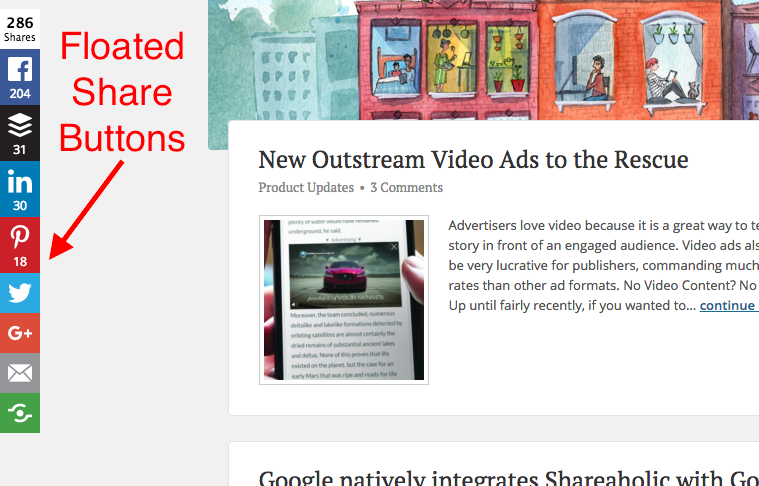
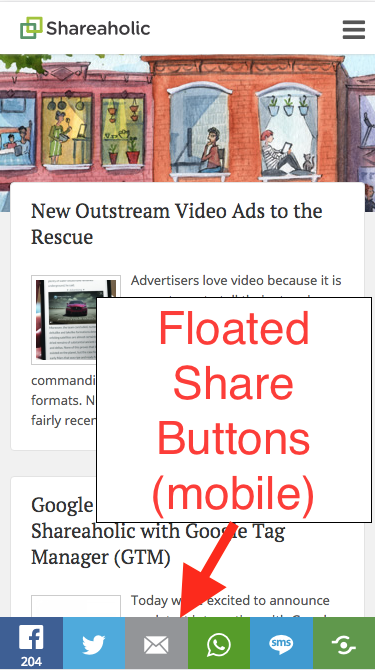
The following tutorial will show you how to disable/enable the Floated Share Buttons app on your site, as well as how to disable/enable the Floated Share Buttons for mobile visitors. The Floated Share Buttons are the icons that appear on the left side of your page (by default). They look like this:
If you are trying to configure our standard Share Buttons instead of the Floated Share Buttons, see this section for instructions on how to customize the standard Share Buttons.
Note: If you are a WordPress or Drupal Plugin User and have not already connected your WordPress site to your Shareaholic account, please follow these instructions on how to do so before following the below instructions.
Enable/Disable the Floated Share Buttons
-
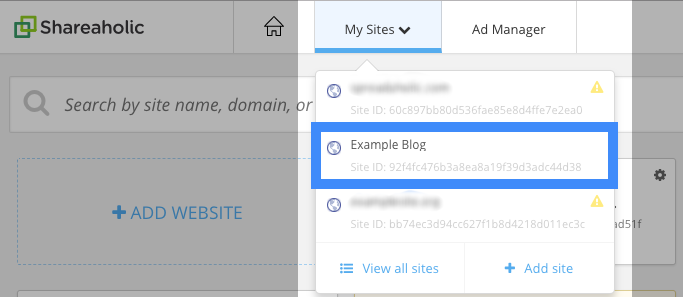
Sign in to your Shareaholic account and select the Site Profile you're working on from the My Sites dropdown menu at the top of the page.
-
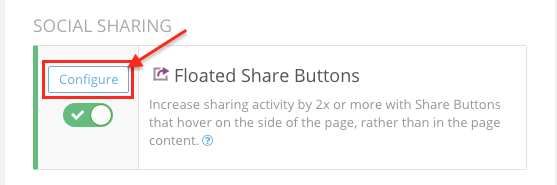
This will bring you to your Site's Apps dashboard. Scroll down to the 'Social Sharing' section to find the Floated Share Buttons settings. Click the toggle button next to Floated Share Buttons to turn the app on or off.
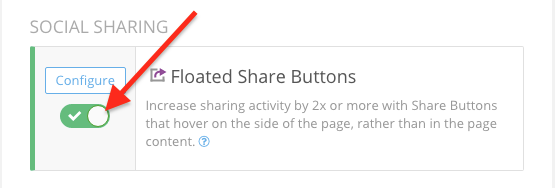
To edit the appearance of your Floated Share Buttons, click the Configure button. Learn More.
- After making your changes, you should see a green banner appear at the top of the page letting you know that your Shareaholic settings have been updated. You're all set!
To enable/disable Floated Share Buttons only for Mobile Visitors:
Alternatively, if you don't want to disable the buttons entirely for mobile users, but do want to adjust their appearance, check out these instructions.
-
Click on the Configure button next to the Floated Share Buttons section.
-
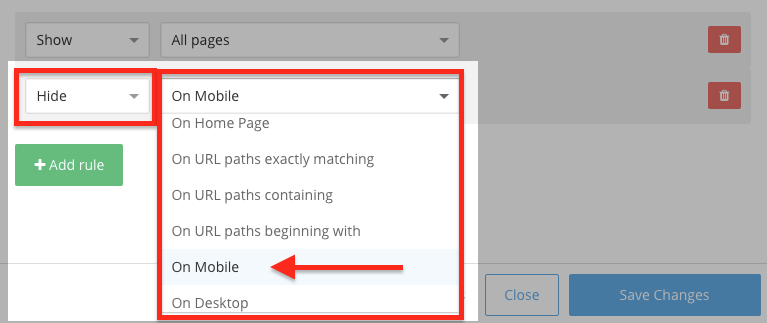
Click on the Targeting Rules tab.

-
Click the green Add Rule button to add a new rule. From the first dropdown, select "Hide," and from the second dropdown, select "On Mobile"
-
Click the Save Changes button when you're done.