
IN THIS ARTICLE
The following tutorial will help you install Shareaholic on Shopify:

If you have not already signed up for Shareaholic, check out the Getting Started with Shareaholic Guide before following the instructions below.
Installing Shareaholic App for Shopify
- Login to your Shareaholic account, or create a new account if you don't already have one.
- Click Add Website from the sites dashboard.
- Enter the URL of your Shopify store and click Continue. Please note, you should not include the HTTP/HTTPS prefix - just the domain is all we need!
- On the 'Choose Platform' screen, select 'Shopify' from the list if it was not automatically selected. Click Continue.
- On the 'Install' page, make sure your Shopify store domain is correct and click Continue.
- You will be redirected to your Shopify Admin dashboard, where you will be prompted to install the Shareaholic app. Click Install Unlisted App to install the plugin.
You will be redirected to your site's Shareaholic Apps dashboard upon successful installation.
-
Congratulations! Shareaholic should now be installed on your Shopify site.
To Install an In-Page App
Shareaholic In-Page Apps are special apps that you let place them exactly where you want in your website layout or template at the location where the app should appear on your page. Our Share Buttons and Related Content apps are both In-Page apps.
If you have not already created an In-Page Shareaholic App, check out the Installing an In-Page Shareaholic App Guide before following the instructions below.
Please note Shopify does include their own Social Share Buttons in the templates, so be sure to disable this setting if you want to use Shareaholic Share Buttons instead.
All Shopify Files will be edited from within the Template Editor, which can be found by going to your Themes page and selecting "Edit Code" from the Actions dropdown on your current theme.
Add In-Page Apps to the Bottom of your Blog Feed
This will insert the app below the pagination in your blog feed pages.
- Open sections/blog-template.liquid in your editor.
- Find the following line in your template:
{% include 'pagination' %} - Place your cursor at the end of the line, and press enter to start a new line.
- Paste your app's HTML code snippet.
- Press the Save button in the top-right.
Adding In-Page Apps Below Each Post in Your Post Index
This will insert the app below each blog article preview in your post index.
- Open sections/blog-template.liquid in your editor.
- Find the highlighted lines of code in your template by searching for:
{% if article.excerpt.size > 0 %}Note: There may be multiple locations that match the above block of code. If you are displaying your blog posts in a Grid layout, look for {% if article.excerpt.size > 0%} line to be preceded by a line that says <div class="rte_article_grid-excerpt">. If you are displaying your blog posts in a List view, then look for the line to be preceded by <div class="rte">
- Place your cursor at the end of the
{% endif %}line and press enter, creating a new line below. - Paste your app's HTML code snippet.
- Press the Save button in the top-right.
Adding In-Page Apps to Your Single Blog Post View
- Open section/article-template.liquid in your editor.
- Find the following line in the template: {{ article.content }}
- Place your cursor at the end of the line and press enter to start a new line.
- Paste your Share Buttons app code.
- Press the Save button in the top-right.
This will insert the Share Buttons above your other social buttons.
To insert the Share Buttons or Related Content app below your other social buttons, follow the above steps with the following changes:
- Create a blank line above the following line:
{{ article.content }} - Paste your Share Buttons or Related Content app code. This will insert the app below your other social buttons.
How to Add In-Page Apps to Your Product Page
- Open sections/product-template.liquid in your editor.
- Find the following line in the template:
{{ product.description }} - Place your cursor after
{{ product.description }}and press enter to start a new line. - Paste your Share Buttons, Follow or Related Content app code.
- Press the Save button in the top-right.
This will insert the Share Buttons below your other social buttons.
To insert the Share Buttons or Related Content app above your other social buttons, follow the above steps with the following changes:
- Create a blank line before the following lines:
{{ product.description }} - Paste your Share Buttons, Follow or Related Content app code.
Adding In-Page Apps to (almost) All Pages
This will insert our apps on all non-product pages except Home, Catalog, and Blog.
- Open page.liquid in your editor.
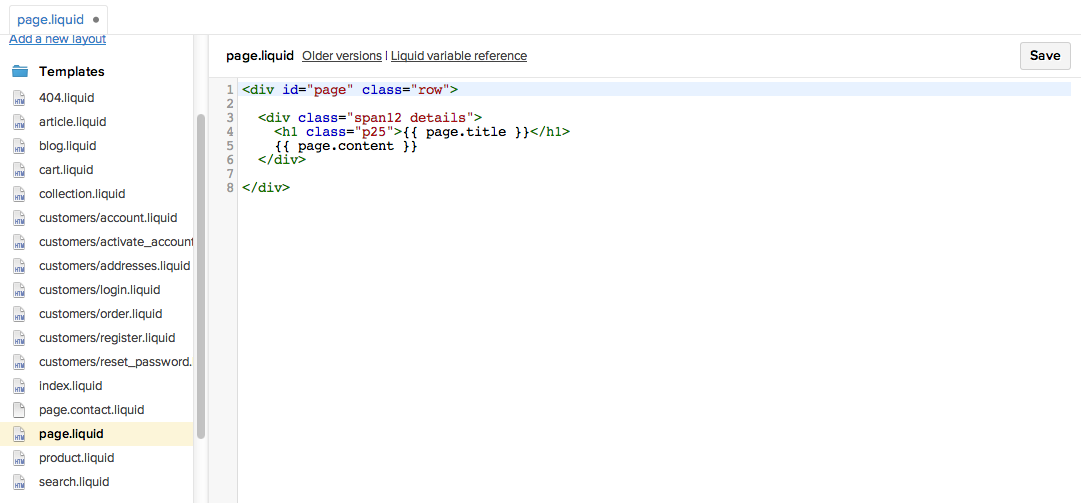
- Find the following line in the template:
{{ page.content }}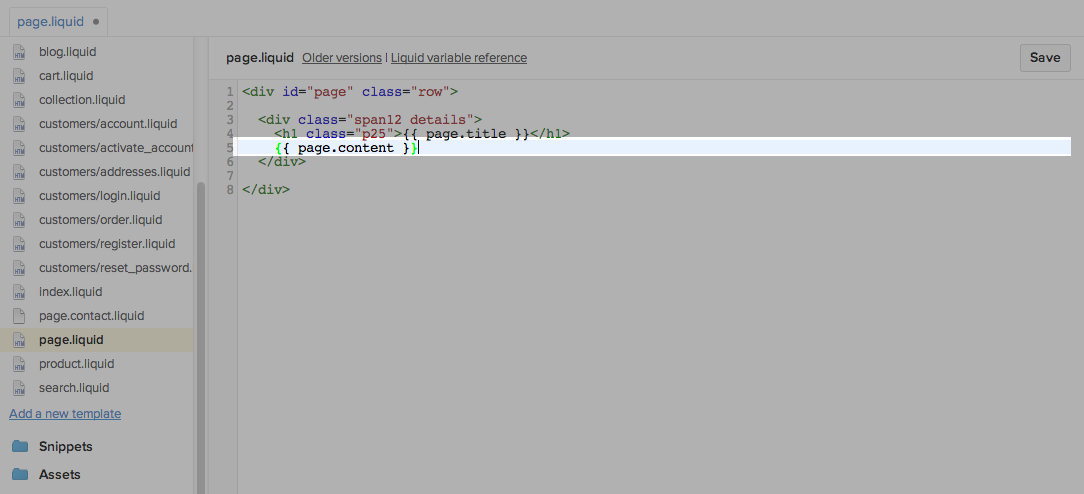
- Place your cursor at the end of the line and press enter to start a new line.

- Paste your Share Buttons app code.
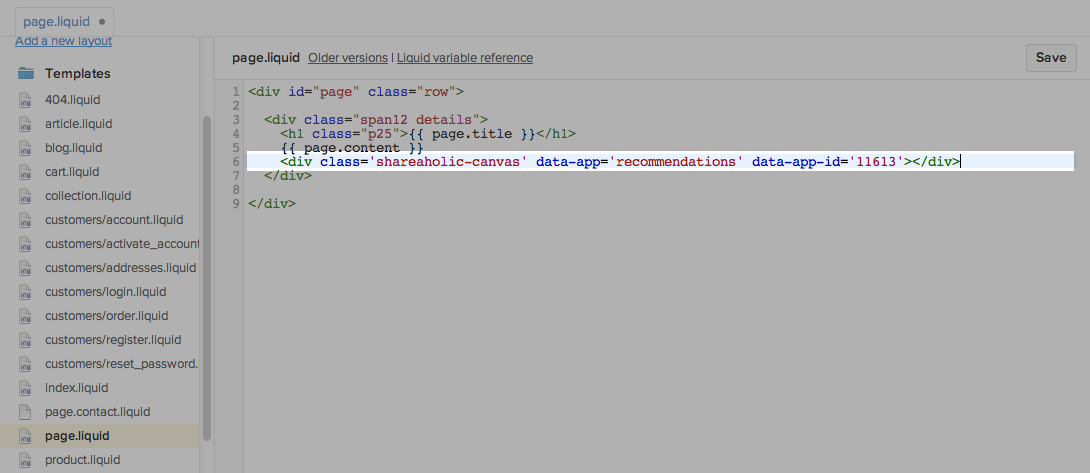
- Press the Save button in the top-right.
Adding In-Page Apps to the Order Confirmation Page
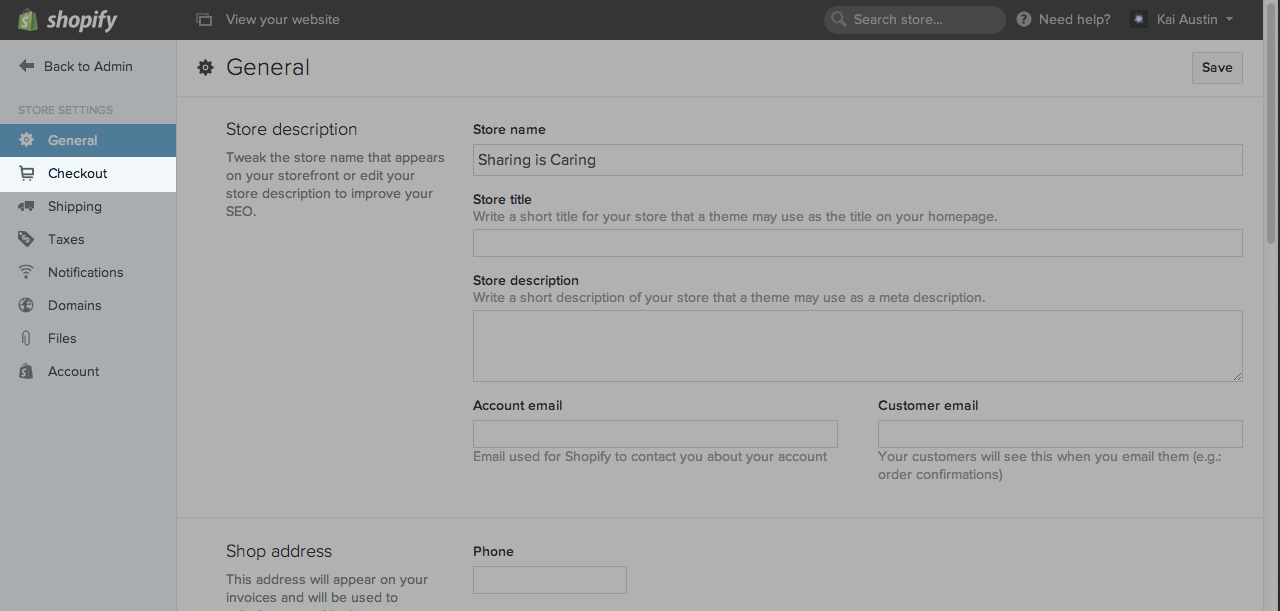
- Open your Shopify Account Dashboard.
- In the menu to the left, select Settings under Configuration.

- Now, under Store Settings, select Checkout from the menu.
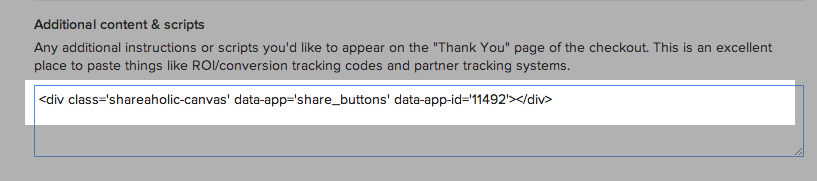
- Find Additional content & scripts in the Order Processing section.
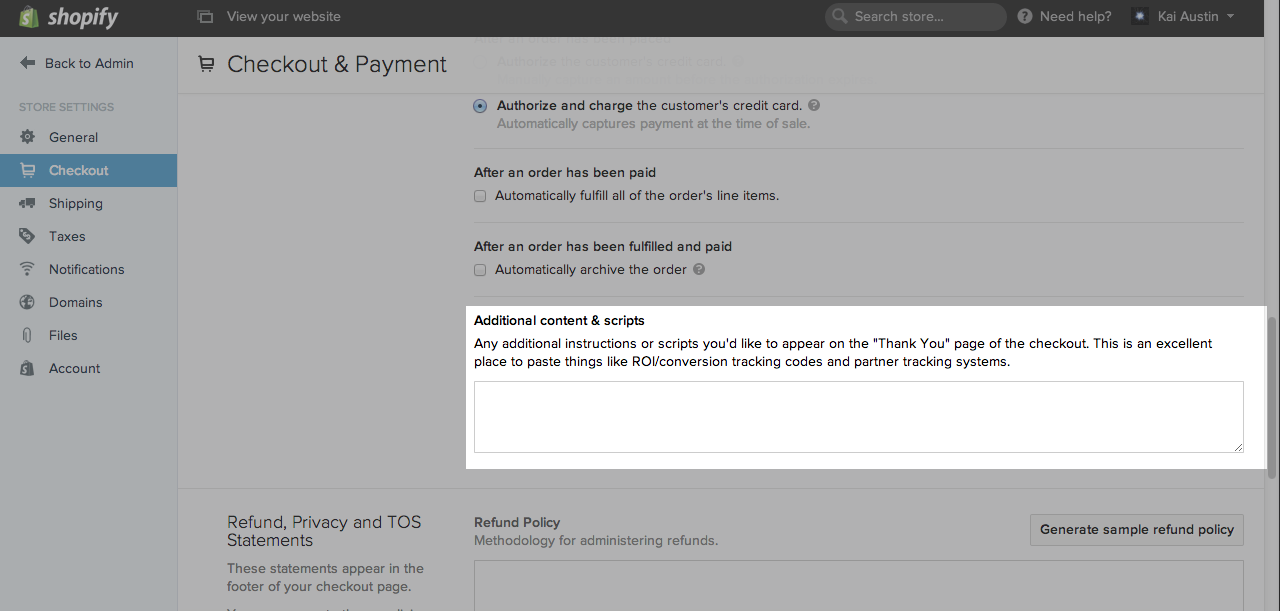
- Paste your app's HTML code snippet.
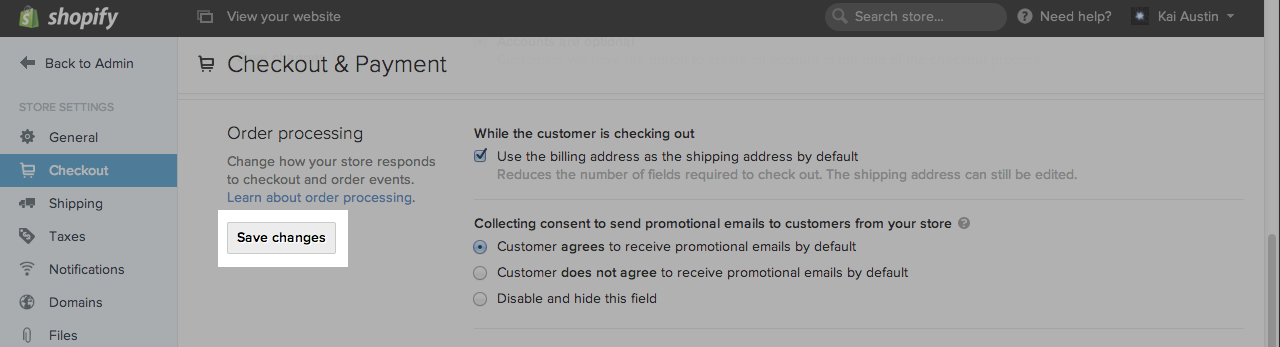
- Press the Save Changes button in the Order Processing section.
Click here for information on special keys that can be set to customize the data being passed into the app.